

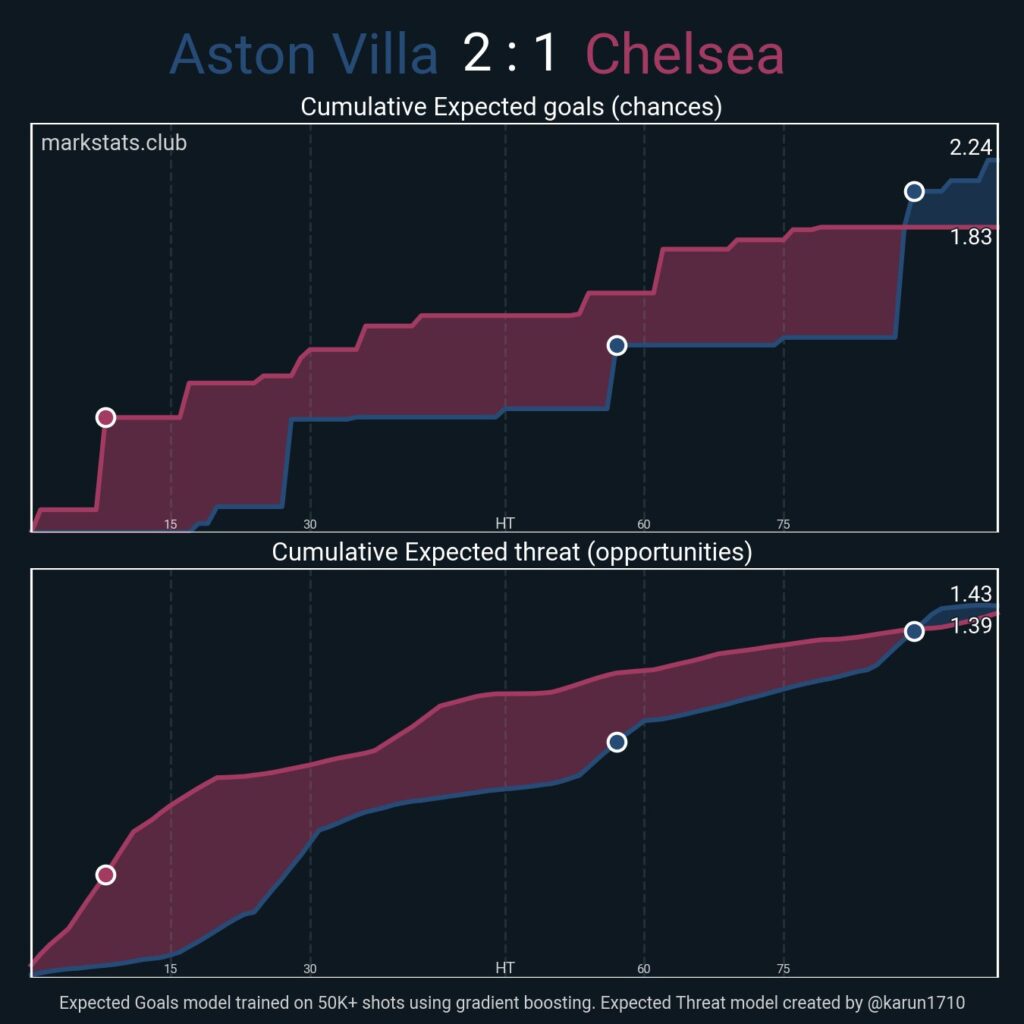
Match Summary
The tactical battle between two renowned strategists of positional play, Unai Emery and Enzo Maresca was an intriguing contest. Both managers are known for their tactical intelligence, making this matchup highly anticipated. Chelsea entered the game following a disappointing 3-0 loss to Brighton, where Maresca experimented with a false nine system, using Cole Palmer and Christopher Nkunku in attack due to Nicolas Jackson’s injury. This time, he deployed Pedro Neto up front, and the Portuguese winger impressed with his deep runs and positional interchanges with Palmer, creating dangerous moments. Unai Emery made four changes to his starting XI from the previous match. Konsa replaced Axel Disasi, Maatsen replaced Digne, Ramsey started instead of Rashford, and Cash replaced García.
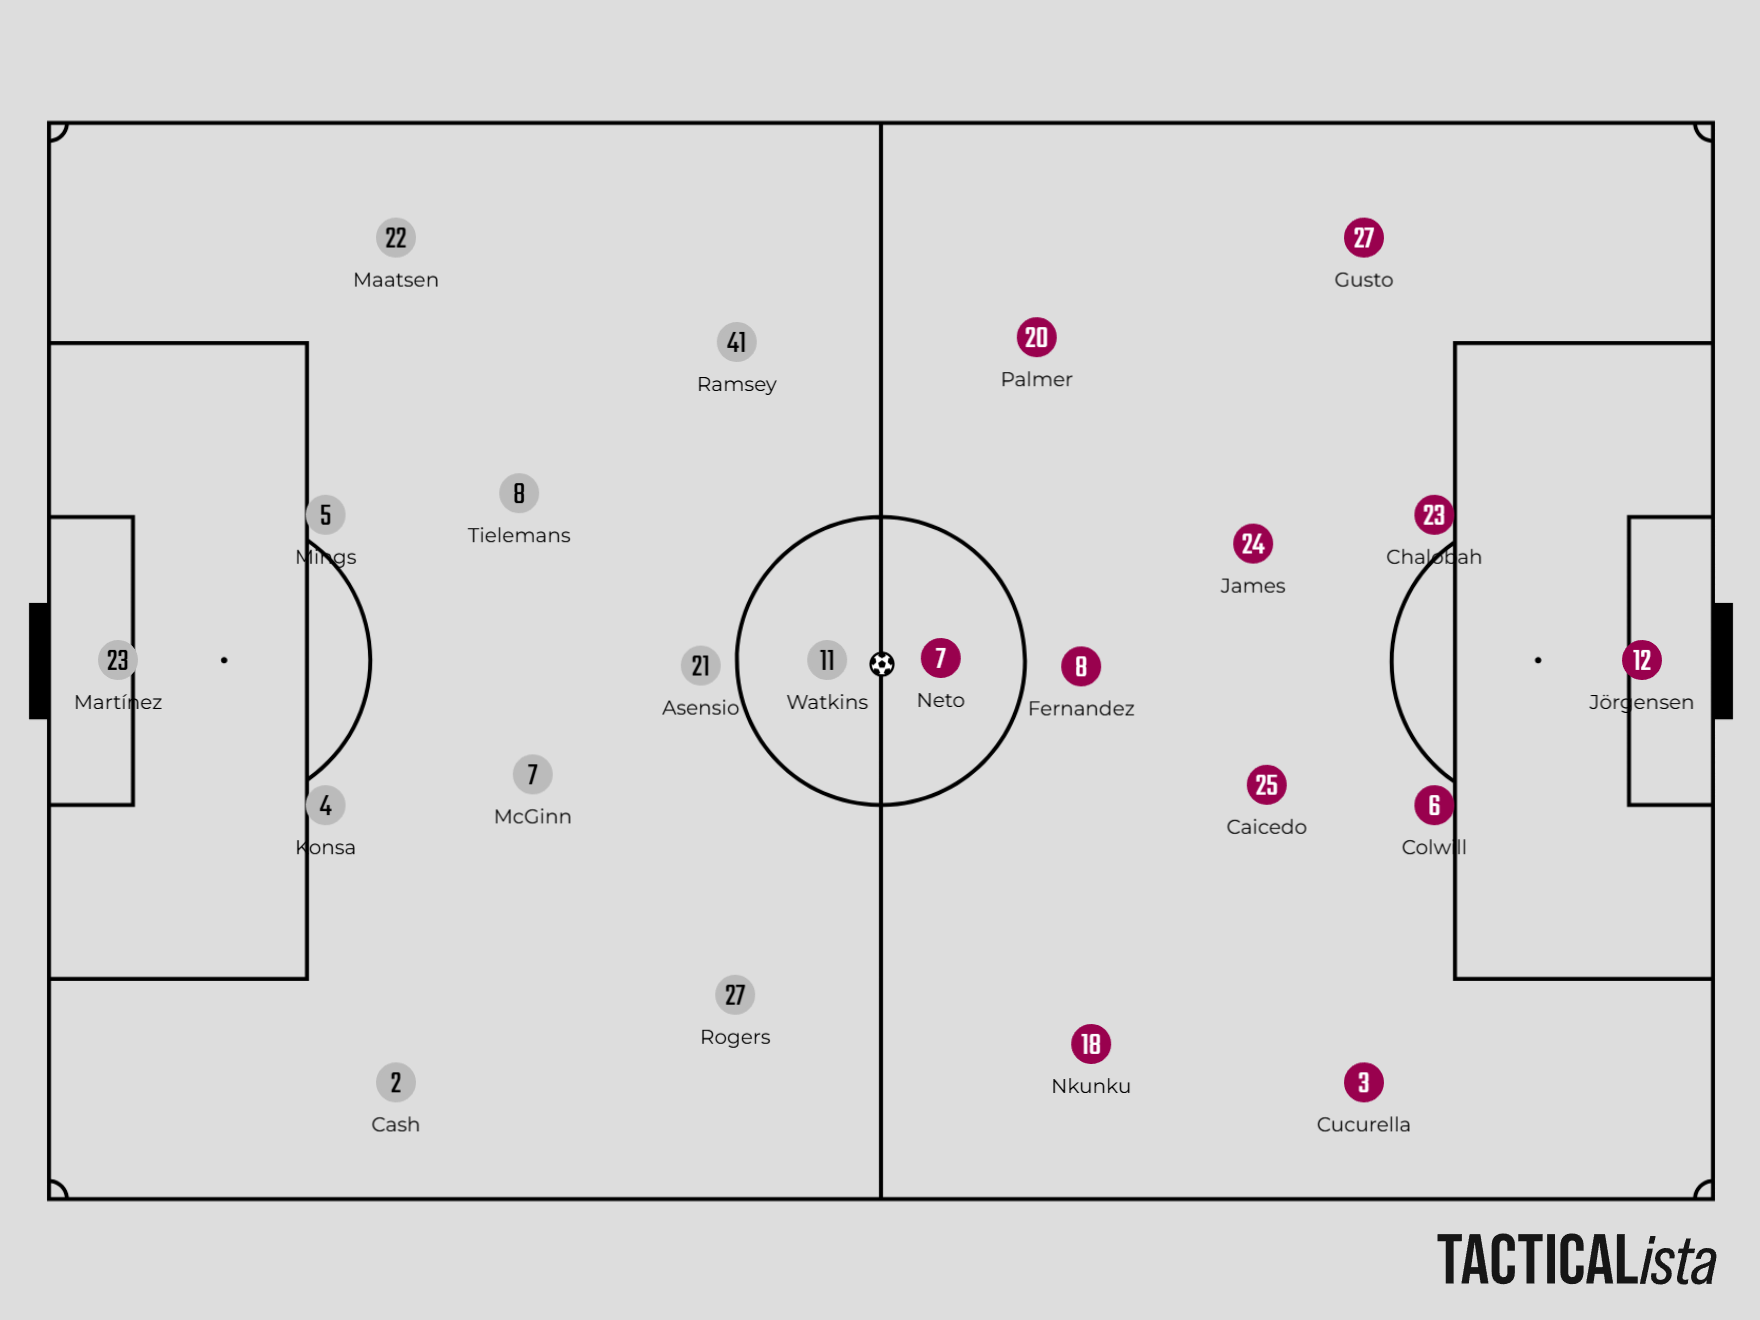
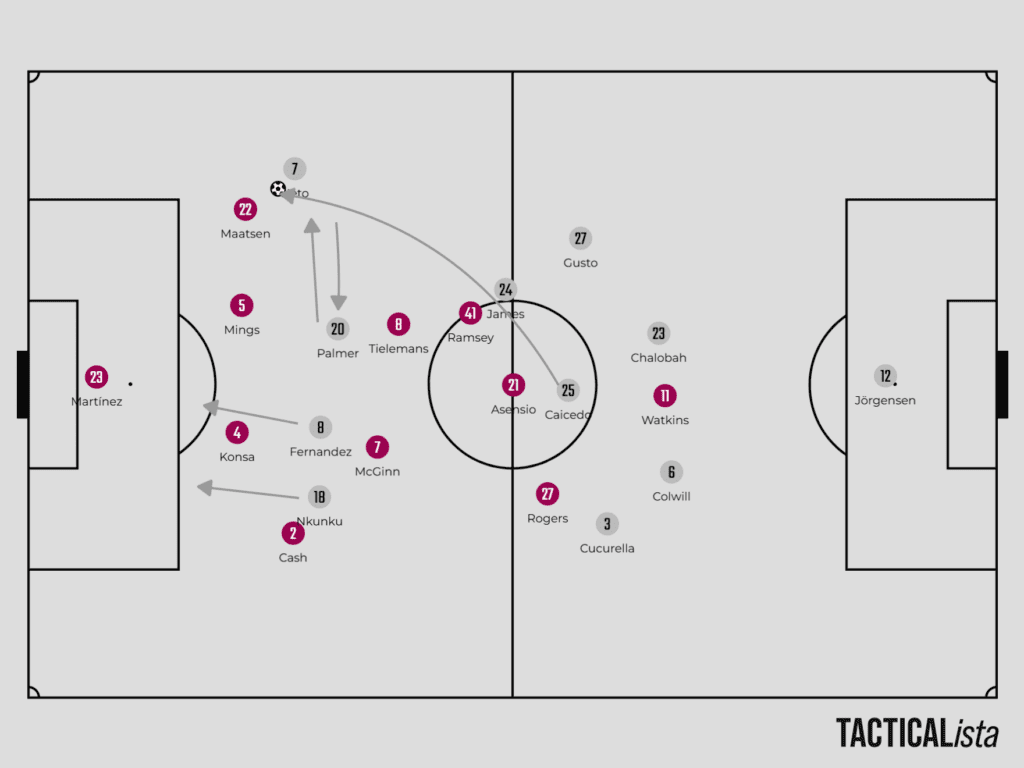
Line up of Aston Villa (4-2-3-1)and Chelsea (4-2-3-1)
Lack of compactness in Aston Villa’s pressing
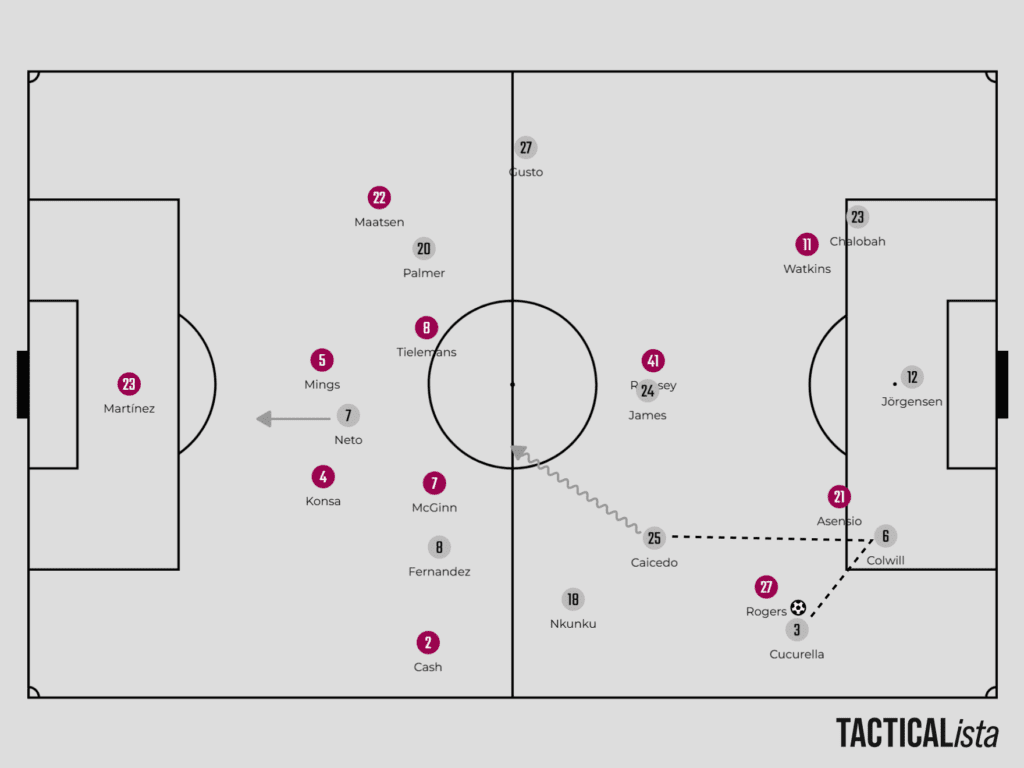
Aston Villa pressed high in the opening minutes, but Chelsea easily played through it. Caicedo received a pass from Colwill and drove forward unchallenged, raising concerns about defensive compactness and the principle of delaying the opponent. Both are fundamental to defending. Tielemans and McGinn dropped deep, leaving large spaces for Chelsea to exploit in midfield. Similar issues arose in the 80th minute and on multiple occasions, particularly within Villa’s mid-blocked 4-2-4 shape. In both situations, Pedro Neto’s intelligent run posed a significant threat.
Villa bypassed Chelsea’s pressing triggers
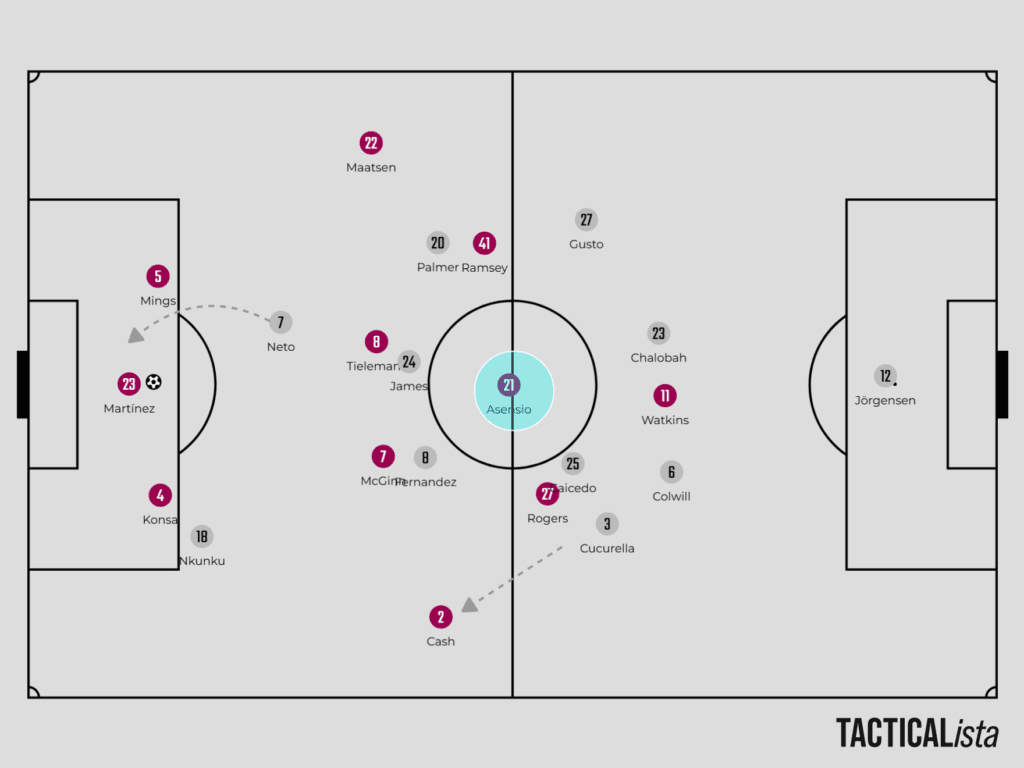
Unai Emery preferred building up from the back, inviting the opponent to press to create space between the lines or behind the defensive line. However, Chelsea countered this with outside-to-inside pressing triggers, forcing the opposition to play centrally, where they marked all the players or opted for long balls to contest the first or second ball. Pedro Neto blocked the passing lane to left center-back Mings while Nkunku pressed high between Konsa and Cash. James and Enzo tightly marked Tielemans and McGinn. In response, Emery deployed a 4-2-3-1 in the first half, positioning three players(Rogers, Asensio, and Ramsey) between the lines. Additionally, Aston Villa used a lopsided high-width approach, with Cucurella either marking Rogers or pressing Cash, the width provider from the right. Chelsea attempted this pressing strategy multiple times throughout the game, but it did not work as effectively as intended.
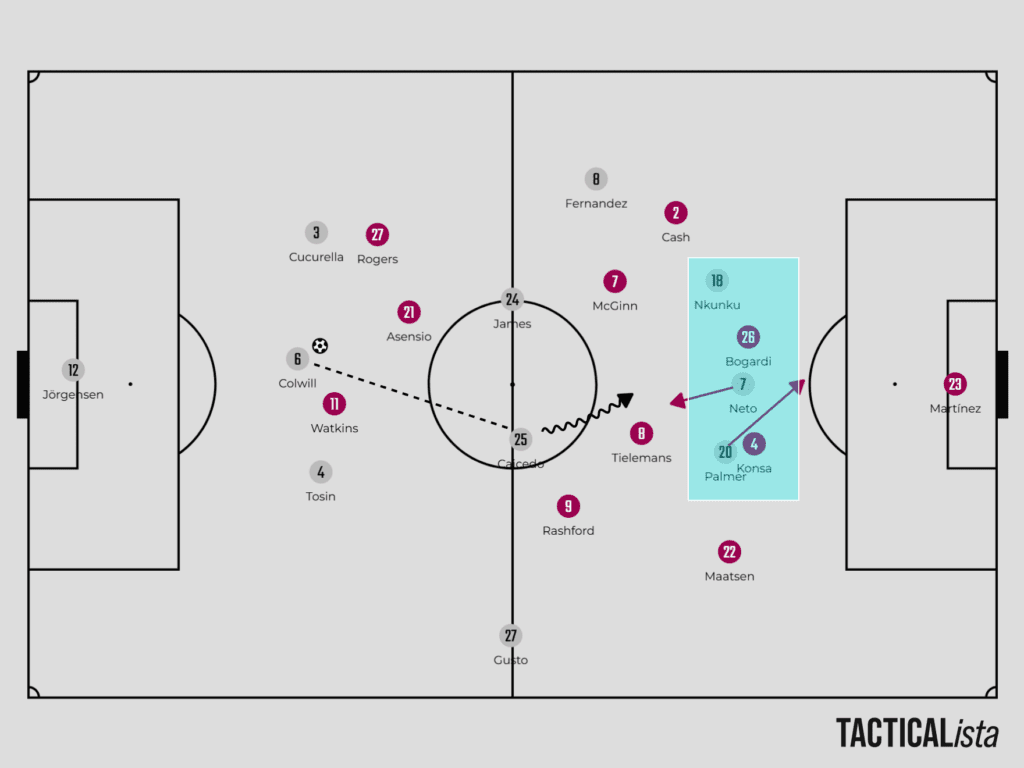
Marcelo Bielsa’s Third Man Concept
“That is the future of football. […] If you do that, you are impossible to defend. That third man is the least developed weapon in football, while in that way, you have the most attack possibilities.”
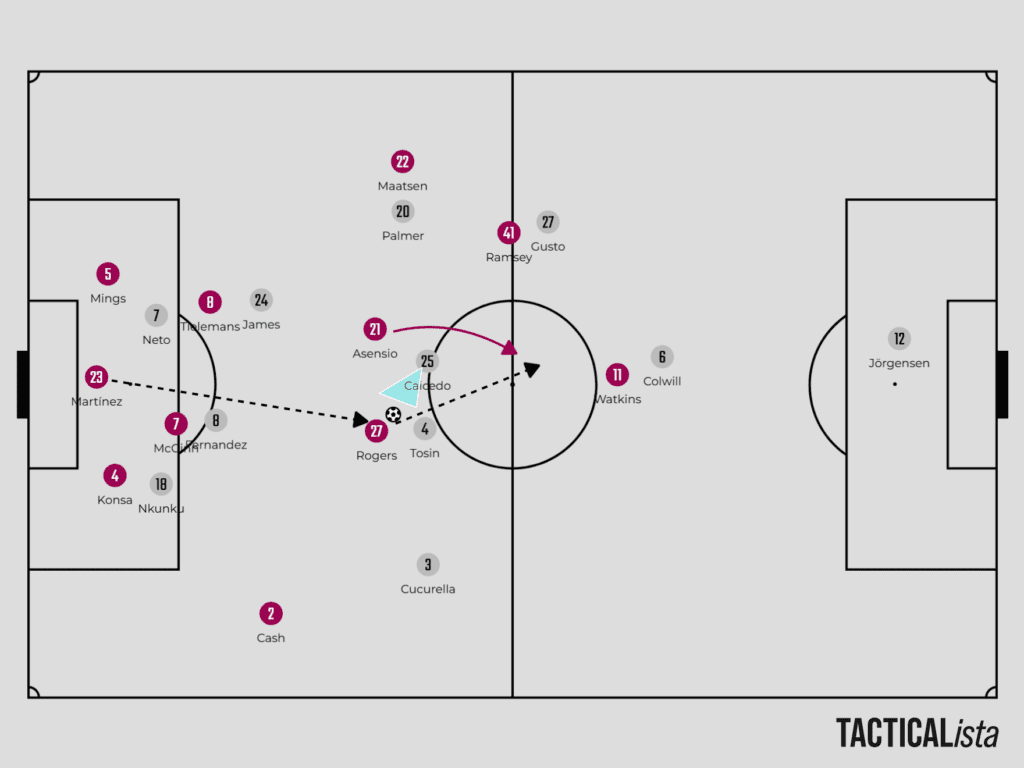
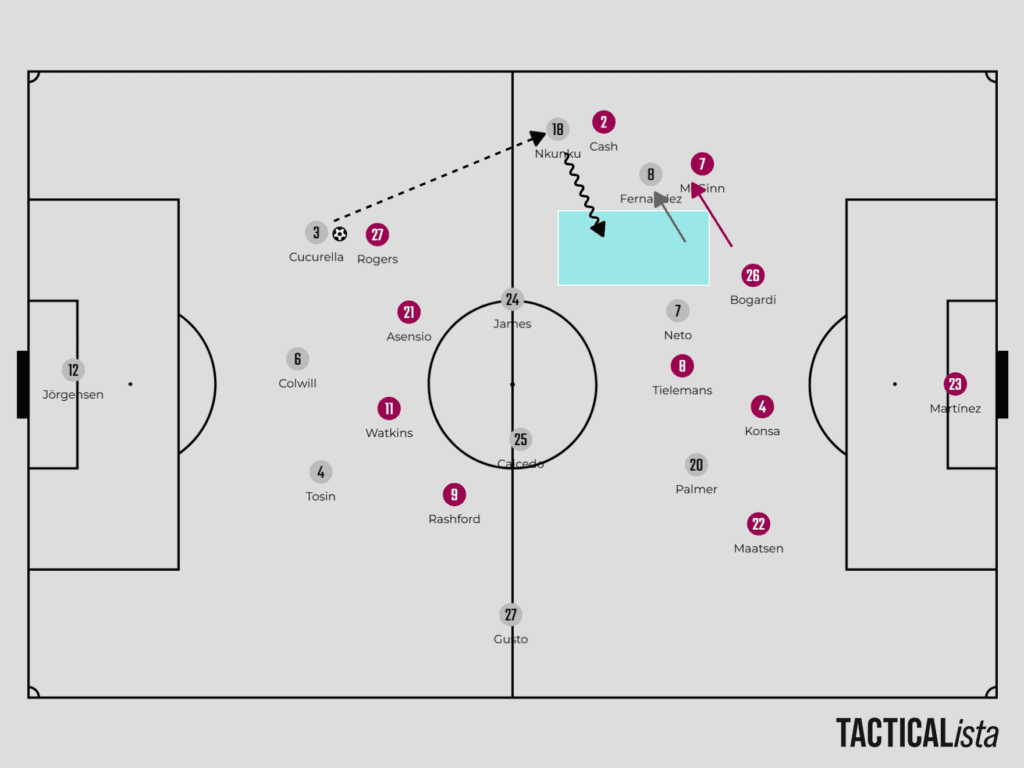
The illustration above highlights how Aston Villa utilised a third-man combination to bypass Chelsea’s press. Chelsea sacrificed their defensive numerical superiority in an attempt to win the ball high up the pitch. Tosin, Chelsea’s right center-back, stepped up to apply pressure, while Caicedo also moved towards the ball as part of the pressing trap when Rogers received a pass from Martínez. However, Rogers showcased his technical ability, executing a well-timed pass to Asensio to complete a third-man combination. This movement broke Chelsea’s second line of press and granted Villa numerical superiority. Despite this well-worked sequence, Watkins failed to capitalise on the opportunity.
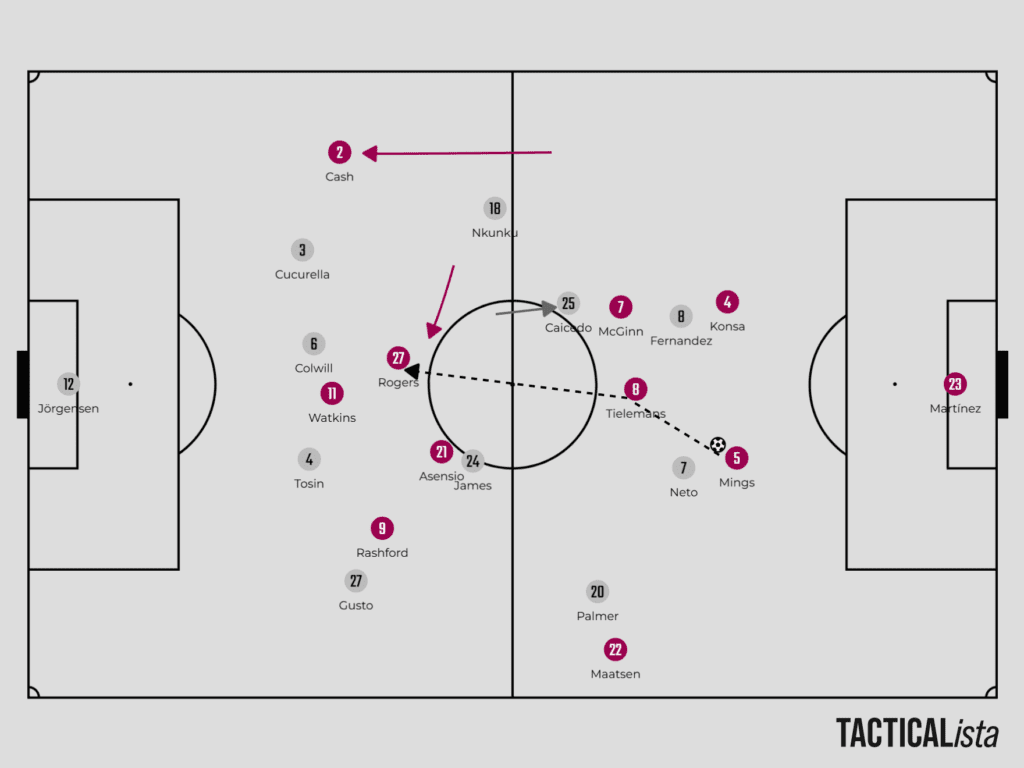
Another example of defensive confusion occurred when Cucurella struggled with his man-marking on Rogers. As Aston Villa’s right-back Cash pushed high up the pitch, he positioned himself on Nkunku’s blind side. This movement unsettled Chelsea’s defensive structure, leaving Cucurella caught between tracking Rogers and covering the space. This hesitation created openings for Villa to exploit in the middle.
Chelsea’s penetration against Aston midblock 4-2-4 or 4-1-4-1
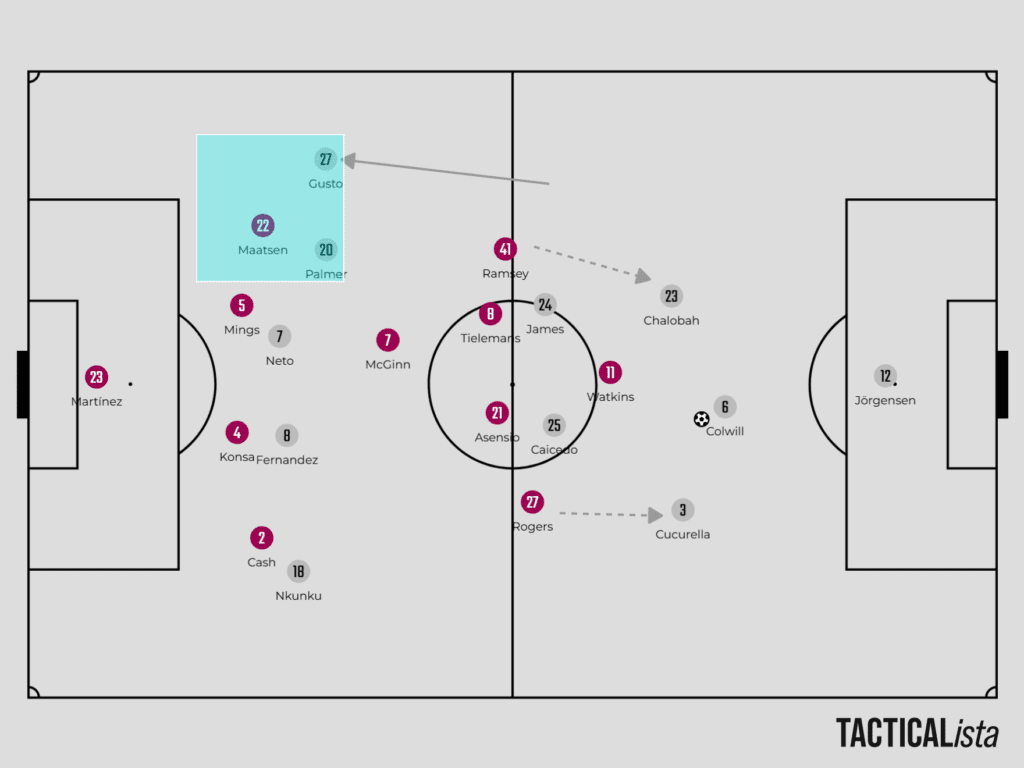
A coach like Enzo Maresca prefers to attack through the middle, and Chelsea frequently succeeded in bypassing Aston Villa’s last-line press with quick ball circulation. However, they also had alternative plans. Caicedo or James played long balls to the wings, exploiting Villa’s left-back, Maatsen, who was often outnumbered in a 2v1 situation against Palmer and Gusto. Gusto made deep runs to create overloads on the flank, and with Ramsey pressing high, it became difficult for him to track back and support Maatsen. This gave Palmer enough time and space to create chances effectively.
With Noni Madueke absent due to injury against Brighton, Chelsea did not rely on a fixed winger but instead used different attacking combinations in the final third. Their first goal came from a similar interchange, Palmer moved centrally while Neto shifted from the centre to the wing, using his pace to beat Maatsen and deliver a cross, which Enzo Fernández converted.
When Chelsea attacked from the left, Nkunku operated as a permanent high-wide presence, frequently cutting inside to exploit the half-space. Enzo Fernández played a key role in this approach by dragging McGinn out of position, creating gaps in Aston Villa’s defensive structure. This movement allowed Chelsea to progress the ball effectively and generate attacking opportunities.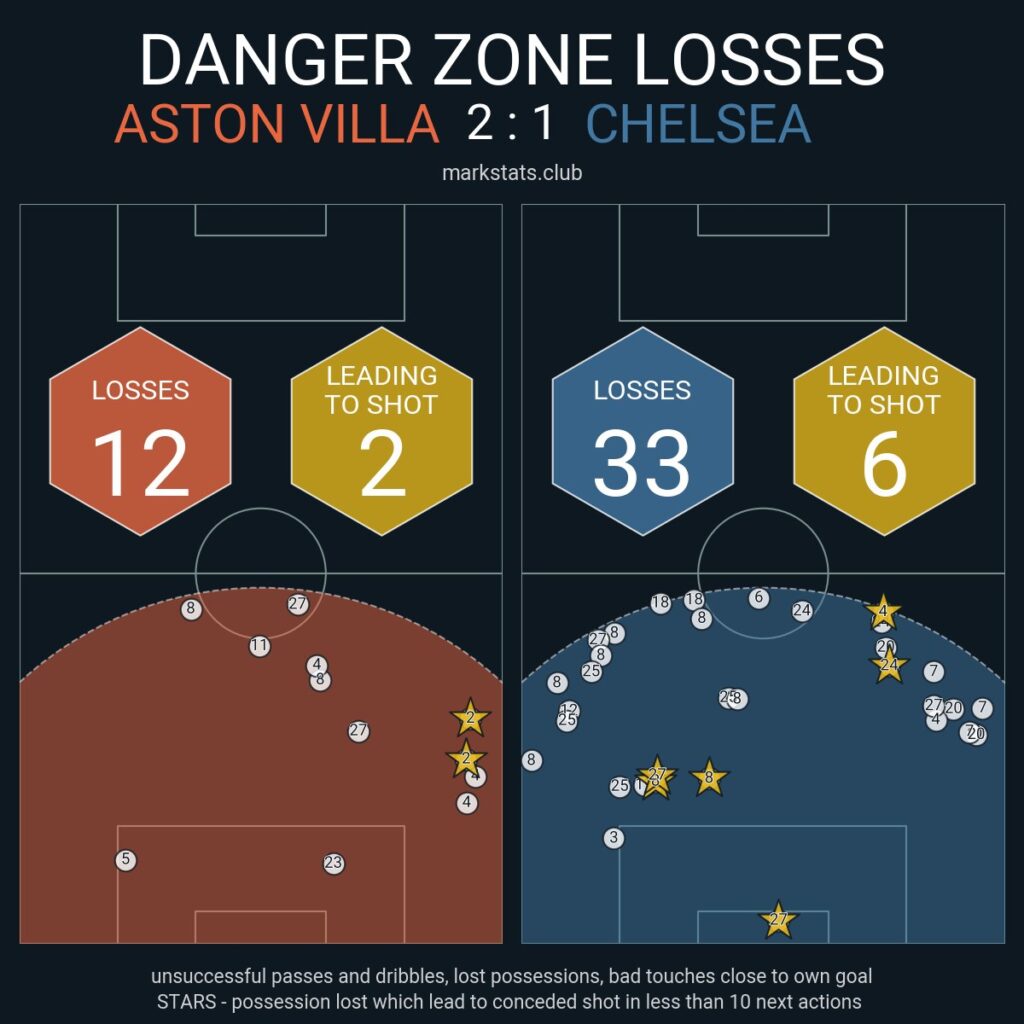
Chelsea lost possession in their own half 33 times, with six of those turnovers leading to shots on their goal, raising concerns about their build-up phase. When Aston Villa won the ball high, they often found themselves in a favourable 3v4 situation, allowing them to exploit Chelsea’s defensive vulnerabilities in transition.
Final Thought
It was an end-to-end game, with both teams creating great chances through counterattacks or bypassing the opposition’s press. Aston Villa capitalised on two set-piece situations, aided by poor goalkeeping from Chelsea’s Filip Jörgensen. Overall, it was an enjoyable match from a tactical perspective, showcasing the strategic battle between the two sides.
Discover more from
Subscribe to get the latest posts sent to your email.